A Node is a type of Terrain Special, which doubles both as a potential ![]() Power source and a high-level Encounter Zone. Nodes also represent unique terrain types that are not found elsewhere (apart from other Nodes), and give different benefits than the generic terrain that the Surveyor (F1) reports them to be on.
Power source and a high-level Encounter Zone. Nodes also represent unique terrain types that are not found elsewhere (apart from other Nodes), and give different benefits than the generic terrain that the Surveyor (F1) reports them to be on.
There are three types of Nodes in the game. Each type corresponds to a specific Realm of magic, and behaves differently as a result:

 Chaos Nodes,
 Nature Nodes,
- and Sorcery Nodes.
There are no Nodes associated with the Realms of ![]() Life and
Life and ![]() Death, which relay their power through religious institutions instead.
Death, which relay their power through religious institutions instead.
Initially, all Nodes are guarded by a contingent of Fantastic Units that belong to the Node's Realm. Once these creatures have been removed, any Wizard may send a ![]() Magic Spirit or
Magic Spirit or ![]() Guardian Spirit to
Guardian Spirit to ![]() Meld with the Node, thus acquiring a constant input of
Meld with the Node, thus acquiring a constant input of ![]() Power based on the Node's coverage area.
Power based on the Node's coverage area.
30 Nodes are generated across the Planes at the start of each game. These Nodes cannot be removed or altered, and no new Nodes will be added during the course of the campaign. The 14 Nodes found on the Plane of Myrror produce much more ![]() Power than the 16 found on Arcanus - but are also better defended.
Power than the 16 found on Arcanus - but are also better defended.
Nodes cause (and represent) oddities in the magical field. During combat at a Node, these interfere with the casting of any spell that is not from the Node's own Realm. The aura of magical energy emanating from the Node also boosts the abilities of all Fantastic Units that belong to the Node's Realm during any battle within the Node's area of influence.
![]() Power output from a Node is determined by the size of its influence zone, a random field spanning 5 to 10 tiles for Arcanus Nodes and 10 to 20 for Myrran ones, roughly centered around (and always including) the tile that the Node itself is on. The Magic Intensity Setting chosen when starting the game also has a direct effect on the generated
Power output from a Node is determined by the size of its influence zone, a random field spanning 5 to 10 tiles for Arcanus Nodes and 10 to 20 for Myrran ones, roughly centered around (and always including) the tile that the Node itself is on. The Magic Intensity Setting chosen when starting the game also has a direct effect on the generated ![]() Power. Nodes can be subverted using the
Power. Nodes can be subverted using the ![]() Warp Node spell, and random "Conjunction" type Events may temporarily alter the amount of
Warp Node spell, and random "Conjunction" type Events may temporarily alter the amount of ![]() Power they provide.
Power they provide.
Description
A Node is a location where the barrier between one of the magical Realms (![]() Nature,
Nature, ![]() Chaos, or
Chaos, or ![]() Sorcery), and the primal planes (Arcanus and Myrror), is weak, allowing
Sorcery), and the primal planes (Arcanus and Myrror), is weak, allowing ![]() Power to seep through in great quantities. There are three types of Nodes in the game, and each corresponds to a different magical Realm.
Power to seep through in great quantities. There are three types of Nodes in the game, and each corresponds to a different magical Realm.
Nature Nodes lead to the ![]() Nature Realm. They are defended by
Nature Realm. They are defended by ![]() Nature creatures, and interfere with non-
Nature creatures, and interfere with non-![]() Nature spells. They appear as magical forests of glowing green trees. The tiles containing these Nodes always show up as Forests in the Surveyor (F1), but these enchanted woods are much more than mere Forests. Their trees bear a wide variety of fruits, and their shades are teeming with a multitude of animals, creating small, contained patches of paradise.
Nature spells. They appear as magical forests of glowing green trees. The tiles containing these Nodes always show up as Forests in the Surveyor (F1), but these enchanted woods are much more than mere Forests. Their trees bear a wide variety of fruits, and their shades are teeming with a multitude of animals, creating small, contained patches of paradise.
Chaos Nodes lead to the ![]() Chaos Realm. They are defended by
Chaos Realm. They are defended by ![]() Chaos creatures, and interfere with non-
Chaos creatures, and interfere with non-![]() Chaos spells. They appear as volcanoes with a wide, glowing red caldera. The tiles containing these Nodes are initially always Volcanoes. In fact, every active Volcano on either Plane will have a Chaos Node in it at the beginning of the game. Warlocks jealous of this power may acquire the means to eventually raise Volcanoes of their own, but these creations will always pale in comparison (and will never contain any Nodes).
Chaos spells. They appear as volcanoes with a wide, glowing red caldera. The tiles containing these Nodes are initially always Volcanoes. In fact, every active Volcano on either Plane will have a Chaos Node in it at the beginning of the game. Warlocks jealous of this power may acquire the means to eventually raise Volcanoes of their own, but these creations will always pale in comparison (and will never contain any Nodes).
Sorcery Nodes lead to the ![]() Sorcery Realm. They are defended by
Sorcery Realm. They are defended by ![]() Sorcery creatures, and interfere with non-
Sorcery creatures, and interfere with non-![]() Sorcery spells. They appear as lakes with bright-blue waters. Yet, the Surveyor (F1) will always claim that the tiles containing these Nodes are Grassland. In reality, these fertile magical waters not only attract an abundance of wildlife, but are so refreshing, that armies marching through will feel no more encumbered than they would were they crossing a flat landscape.
Sorcery spells. They appear as lakes with bright-blue waters. Yet, the Surveyor (F1) will always claim that the tiles containing these Nodes are Grassland. In reality, these fertile magical waters not only attract an abundance of wildlife, but are so refreshing, that armies marching through will feel no more encumbered than they would were they crossing a flat landscape.
If a Node is ![]() Melded with by a
Melded with by a ![]() Magic Spirit or
Magic Spirit or ![]() Guardian Spirit, the Node tile, and any tile within its zone of influence, will glow with magical
Guardian Spirit, the Node tile, and any tile within its zone of influence, will glow with magical ![]() sparkles of the same color as the empire that sent that spirit.
sparkles of the same color as the empire that sent that spirit.
Distribution and Terrain
When creating the world for a new campaign, the game randomly places 30 Nodes at various locations on both Planes (16 on Arcanus, and 14 on Myrror). The overall number of Nodes always remains constant between games. However, the types of Nodes created is different, and there is no guarantee that any type of Node will appear on either of the Planes. Nodes may not be created less than 3 tiles away from any edge of the map (including the invisible horizontal boundary), or any other Node.
The Terrain underneath a Node is always determined by the Node itself: the actual tiles will be converted to special terrain types that are unique to Nodes. Unfortunately, this is not directly reflected by the Surveyor (F1), which will always show ![]() Nature Nodes as Forests,
Nature Nodes as Forests, ![]() Chaos Nodes as Volcanoes, and
Chaos Nodes as Volcanoes, and ![]() Sorcery Nodes as Grasslands. In any case, it is not possible to change the terrain of any tile containing a Node, with one exception: in games played without the Unofficial Patch 1.50, the
Sorcery Nodes as Grasslands. In any case, it is not possible to change the terrain of any tile containing a Node, with one exception: in games played without the Unofficial Patch 1.50, the ![]() Gaia's Blessing spell can alter the appearance and Town bonuses of a
Gaia's Blessing spell can alter the appearance and Town bonuses of a ![]() Chaos Node Volcano tile by turning it into a Hill instead (while leaving the actual Node intact).
Chaos Node Volcano tile by turning it into a Hill instead (while leaving the actual Node intact).
A Node's tile is an invalid location for constructing a new Outpost, although it is possible to build a Road or Enchanted Road over it. On the other hand, Towns may be built next to a Node, and such Towns will enjoy the full benefit of the Node's special terrain type, even if the Node's defenders have not yet been vanquished, or the Node belongs to another Wizard. If the Town is also within the Node's zone of influence, then Fantastic Units of the corresponding Realm will also fight with increased effectiveness here. This may be worth considering when settling next to an unconquered Node that can still generate Rampaging Monsters.
The special terrain types that come with Nodes generally grant more powerful benefits than the tile type indicated by the Surveyor (F1), and are almost always worth including in the catchment area of any Settlement. The Volcanoes of a ![]() Chaos Node are the only ones for which the game gives an accurate description: these tiles provide the same
Chaos Node are the only ones for which the game gives an accurate description: these tiles provide the same ![]() 5% production bonus that Mountain tiles do, which is the biggest such benefit available from a single tile.
5% production bonus that Mountain tiles do, which is the biggest such benefit available from a single tile.
The Grassland under ![]() Sorcery Nodes provides
Sorcery Nodes provides ![]() 2 instead of the displyed 1.5, which puts it on par with River and River Mouth tiles without the hindrance that those tiles present to
2 instead of the displyed 1.5, which puts it on par with River and River Mouth tiles without the hindrance that those tiles present to ![]() Walking units. Finally, the enchanted Forests of
Walking units. Finally, the enchanted Forests of ![]() Nature Nodes yield the game's highest possible
Nature Nodes yield the game's highest possible ![]() Food available on a single tile:
Food available on a single tile: ![]() 2.5. Regular Forest tiles can only match this amount with the Wild Game Terrain Special, which, unlike the Node, is susceptible to destruction (although at the same time it also increases actual
2.5. Regular Forest tiles can only match this amount with the Wild Game Terrain Special, which, unlike the Node, is susceptible to destruction (although at the same time it also increases actual ![]() Food output, not just its availability).
Food output, not just its availability).
Node Generation
The official Strategy Guide claims that the terrain surrounding the location picked for a Node has some influence over the type of the Node that will appear there. While this indeed used to be the case in the earliest versions of the game, this information is now outdated and is no longer true from v1.1 onwards. In the more recent versions, Node generation is based mostly on chance. The initial type is determined by a set of random "bias" variables, that result in ![]() Sorcery Nodes ~60% of the time (3,370 in 5,625),
Sorcery Nodes ~60% of the time (3,370 in 5,625), ![]() Nature Nodes ~22% of the time (1,240 in 5,625), and
Nature Nodes ~22% of the time (1,240 in 5,625), and ![]() Chaos Nodes in the remaining ~18% (1,015 in 5,625).
Chaos Nodes in the remaining ~18% (1,015 in 5,625).
The Nodes are then put through an "equalizing" procedure, which randomly converts ![]() Sorcery Nodes to a different type if their amount on either Plane exceeds a certain treshold. This limit is 9 on Arcanus, and 4 on Myrror. If there are more
Sorcery Nodes to a different type if their amount on either Plane exceeds a certain treshold. This limit is 9 on Arcanus, and 4 on Myrror. If there are more ![]() Sorcery Nodes than this, the game will keep randomly converting them, first to
Sorcery Nodes than this, the game will keep randomly converting them, first to ![]() Chaos, then to
Chaos, then to ![]() Nature, until there is at least a certain amount of each of them on the Plane in question. Arcanus will then have at least 6 of those two types, while Myrror will have at least 3; irrespective of the remaining amount of
Nature, until there is at least a certain amount of each of them on the Plane in question. Arcanus will then have at least 6 of those two types, while Myrror will have at least 3; irrespective of the remaining amount of ![]() Sorcery Nodes in either case.
Sorcery Nodes in either case.
Generally, this yields pre-set ratios of 6-6-4 and 3-3-8 (![]() Chaos -
Chaos - ![]() Nature -
Nature - ![]() Sorcery) on Arcanus and Myrror respectively, as is clearly visible in the tables below, that illustrate the statistical distribution of the Nodes from each Realm. The first table for each Plane lists the probabilities for each Node type's individual count on that Plane, while the second tables show the chances of particular
Sorcery) on Arcanus and Myrror respectively, as is clearly visible in the tables below, that illustrate the statistical distribution of the Nodes from each Realm. The first table for each Plane lists the probabilities for each Node type's individual count on that Plane, while the second tables show the chances of particular ![]() Chaos /
Chaos / ![]() Nature combinations.
Nature combinations.
Arcanian Node Distribution
| Amount | 00 | 01 | 02 | 03 | 04 | 05 | 06 | 07 | 08 | 09 | 10 | 11 | 12+ | Average |
|---|---|---|---|---|---|---|---|---|---|---|---|---|---|---|
| 0.00 % | 0.00 % | 0.01 % | 0.08 % | 52.83 % | 1.45 % | 3.97 % | 8.48 % | 14.25 % | 18.93 % | 0 % | 0 % | 0 % | 5.86 | |
| 0.10 % | 0.93 % | 3.68 % | 8.33 % | 11.91 % | 11.19 % | 59.49 % | 3.08 % | 0.98 % | 0.25 % | 0.05 % | 0.01 % | 0.00 % | 5.26 | |
| 0.46 % | 2.82 % | 7.62 % | 11.86 % | 11.80 % | 7.86 % | 56.04 % | 1.19 % | 0.29 % | 0.06 % | 0.01 % | 0.00 % | 0.00 % | 4.88 |
| Realm | Sum | ||||||||||||
|---|---|---|---|---|---|---|---|---|---|---|---|---|---|
| 0 % | 0 % | 0 % | 0 % | 0 % | 0 % | 0 % | 0.07 % | 0.02 % | 0.01 % | 0.00 % | 0.10 % | ||
| 0 % | 0 % | 0 % | 0 % | 0 % | 0 % | 0.61 % | 0.23 % | 0.07 % | 0.02 % | 0.00 % | 0.93 % | ||
| 0 % | 0 % | 0 % | 0 % | 0 % | 2.22 % | 1.00 % | 0.35 % | 0.09 % | 0.02 % | 0.00 % | 3.68 % | ||
| 0 % | 0 % | 0 % | 0 % | 4.52 % | 2.45 % | 0.98 % | 0.30 % | 0.07 % | 0.01 % | 0.00 % | 8.33 % | ||
| 0 % | 0 % | 0 % | 5.52 % | 3.74 % | 1.80 % | 0.63 % | 0.16 % | 0.03 % | 0.00 % | 0.00 % | 11.91 % | ||
| 0 % | 0 % | 4.05 % | 3.66 % | 2.20 % | 0.93 % | 0.28 % | 0.06 % | 0.01 % | 0.00 % | 0.00 % | 11.19 % | ||
| 0 % | 1.65 % | 2.24 % | 1.80 % | 0.95 % | 0.34 % | 52.51 % | 0.01 % | 0.00 % | 0.00 % | 0.00 % | 59.49 % | ||
| 0.29 % | 0.78 % | 0.94 % | 0.66 % | 0.30 % | 0.09 % | 0.02 % | 0.00 % | 0.00 % | 0.00 % | 0 % | 3.08 % | ||
| 0.12 % | 0.29 % | 0.30 % | 0.18 % | 0.07 % | 0.02 % | 0.00 % | 0.00 % | 0.00 % | 0 % | 0 % | 0.98 % | ||
| 0.04 % | 0.08 % | 0.07 % | 0.04 % | 0.01 % | 0.00 % | 0.00 % | 0.00 % | 0 % | 0 % | 0 % | 0.25 % | ||
| 0.01 % | 0.02 % | 0.01 % | 0.01 % | 0.00 % | 0.00 % | 0.00 % | 0 % | 0 % | 0 % | 0 % | 0.05 % | ||
| Sum | 0.46 % | 2.82 % | 7.62 % | 11.86 % | 11.80 % | 7.86 % | 56.04 % | 1.19 % | 0.29 % | 0.06 % | 0.01 % | ||
Myrran Node Distribution
| Amount | 00 | 01 | 02 | 03 | 04 | 05 | 06 | 07 | 08 | 09 | 10 | 11+ | Average |
|---|---|---|---|---|---|---|---|---|---|---|---|---|---|
| 0.00 % | 0.01 % | 0.08 % | 0.60 % | 2.97 % | 8.04 % | 17.13 % | 26.61 % | 44.56 % | 0 % | 0 % | 0 % | 7.00 | |
| 0.00 % | 0.01 % | 0.04 % | 62.61 % | 19.59 % | 11.08 % | 4.70 % | 1.52 % | 0.38 % | 0.07 % | 0.01 % | 0.00 % | 3.64 | |
| 0.00 % | 0.03 % | 0.12 % | 76.18 % | 14.51 % | 6.39 % | 2.11 % | 0.53 % | 0.10 % | 0.02 % | 0.00 % | 0.00 % | 3.36 |
| Realm | Sum | |||||||||||
|---|---|---|---|---|---|---|---|---|---|---|---|---|
| 0 % | 0 % | 0 % | 0 % | 0 % | 0 % | 0 % | 0 % | 0 % | 0 % | 0.00 % | ||
| 0 % | 0 % | 0 % | 0 % | 0 % | 0 % | 0 % | 0 % | 0 % | 0.01 % | 0.01 % | ||
| 0 % | 0 % | 0 % | 0 % | 0 % | 0 % | 0 % | 0 % | 0.03 % | 0.00 % | 0.04 % | ||
| 0 % | 0 % | 0 % | 44.56 % | 10.59 % | 5.09 % | 1.81 % | 0.48 % | 0.07 % | 0.00 % | 62.61 % | ||
| 0 % | 0 % | 0 % | 16.02 % | 2.43 % | 0.88 % | 0.22 % | 0.04 % | 0.00 % | 0.00 % | 19.59 % | ||
| 0 % | 0 % | 0 % | 9.61 % | 1.07 % | 0.32 % | 0.06 % | 0.01 % | 0.00 % | 0.00 % | 11.08 % | ||
| 0 % | 0 % | 0 % | 4.28 % | 0.33 % | 0.08 % | 0.01 % | 0.00 % | 0.00 % | 0 % | 4.70 % | ||
| 0 % | 0 % | 0 % | 1.44 % | 0.07 % | 0.01 % | 0.00 % | 0.00 % | 0 % | 0 % | 1.52 % | ||
| 0 % | 0 % | 0.11 % | 0.26 % | 0.01 % | 0.00 % | 0.00 % | 0 % | 0 % | 0 % | 0.38 % | ||
| 0 % | 0.03 % | 0.02 % | 0.02 % | 0.00 % | 0.00 % | 0 % | 0 % | 0 % | 0 % | 0.07 % | ||
| Sum | 0.00 % | 0.03 % | 0.12 % | 76.18 % | 14.51 % | 6.39 % | 2.11 % | 0.53 % | 0.10 % | 0.02 % | ||
It may also be interesting to evaluate how the average amounts deviate from both the "non-equalized" chances, and the pre-set ratios which, in this case, could also be said to represent the median of the distributions. These values are highlighted in the next table.
| Arcanus | Myrror | |||||
| Base chance | 9.59 | 3.53 | 2.88 | 8.39 | 3.09 | 2.52 |
| Equalize limit | 9 | - | - | 4 | - | - |
| Pre-set | 4 | 6 | 6 | 8 | 3 | 3 |
| Actual average | 5.86 | 5.26 | 4.88 | 7.00 | 3.64 | 3.36 |
These numbers also show how differently the "equalizing" procedure behaves on the two Planes by virtue of the amount of ![]() Sorcery Nodes required to activate it. On Arcanus, where the average count of this Node type is just above the function's treshold, there is a fair chance that it will not be invoked at all, leaving intact whatever amount of Nodes were initially generated. Once it does kick in however, it drastically reduces the amount of
Sorcery Nodes required to activate it. On Arcanus, where the average count of this Node type is just above the function's treshold, there is a fair chance that it will not be invoked at all, leaving intact whatever amount of Nodes were initially generated. Once it does kick in however, it drastically reduces the amount of ![]() Sorcery Nodes (by at least 6), while roughly doubling the other two.
Sorcery Nodes (by at least 6), while roughly doubling the other two.
In contrast, the function will nearly always trigger on Myrror (the average ![]() Sorcery Node count being over twice as much as the trigger treshold). However, in this case, the presets are very close to the average values, and there may either not be any actual "equalizing" at all, or it will be limited to very small number of conversions, mostly to a single other type.
Sorcery Node count being over twice as much as the trigger treshold). However, in this case, the presets are very close to the average values, and there may either not be any actual "equalizing" at all, or it will be limited to very small number of conversions, mostly to a single other type.
As a direct consequence of the different tresholds, Myrror is much less likely to feature no Nodes of one type or another, although the likelyhood of this happening on either Plane is already extremely low to begin with. At the same time, Myrror will generally have a higher amount of ![]() Sorcery Nodes despite it having a lower total Node count, as this will nearly always be the case when the Arcanus Nodes are "equalized". In addition, with respect to
Sorcery Nodes despite it having a lower total Node count, as this will nearly always be the case when the Arcanus Nodes are "equalized". In addition, with respect to ![]() Chaos and
Chaos and ![]() Nature Nodes, the only way to have very few (or none) of one type is to have an excessive amount of the other, at least enough to bring the
Nature Nodes, the only way to have very few (or none) of one type is to have an excessive amount of the other, at least enough to bring the ![]() Sorcery Node count below the limit of triggering the "equalization".
Sorcery Node count below the limit of triggering the "equalization".
While as mentioned above, terrain does not normally play a role in Node generation in the more recent game versions, there is actually one exception. When the game selects a set of random coordinates to check if a Node may be created there, there is a good chance (especially on lower Land Size Settings) that the tile is not an actual land tile: i.e. it is an Ocean or a Shore. Typically, the program will then evaluate whether to go through with creating the Node there (since the tile will be altered anyway) using another random roll.
On Arcanus, such a tile has a 1-in-40 (2.5%) chance of being accepted, and a Node is then created on it. However, the function suffers from a major bug with regards to Myrran Nodes. The code calls for a 1-in-25 (4%) chance for allowing Node creation, but when the coordinates are actually checked against the tile type, the Arcanian terrain is used instead of the Myrran map. That is, if the Myrran coordinates point to a land tile on Arcanus, the Node will be created on Myrror without ever considering the Myrran terrain. This results in a much higher amount of Myrran Nodes being created in Oceans than intended. The Unofficial Patch 1.50 corrects this behaviour, and players using it will find significantly less Nodes on 1-2 tile islands on Myrror (which also greatly reduces the overall existence of such islands).
Encounter Zone
- Main article: Encounter Zone

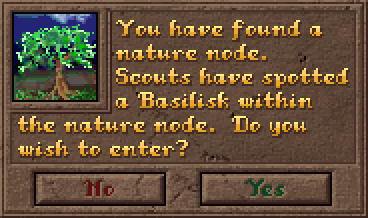
An example Node scouting dialogue.
When initially created, every Node designates an Encounter Zone. That is, a randomly generated group of neutral creatures defending some sort of Treasure. The value of this Treasure is inexorably tied to the strength of its guardians, i.e. the stronger the monsters, the better their Treasure (on average at least, considering that it is ultimately random). The following sections explain how the game chooses these creatures and the rewards for defeating them.
Defenders
Each Encounter Zone can contain up to 9 defending units. These are always Fantastic Creatures, and any single Node can feature up to two different types of them. However, they will always be of the same magical Realm (matching that of the Node itself).
The exact types and amounts of the guardians are determined through several steps, the first of which is setting out an "encounter budget", which defines the total possible value of the defending units. For a Node, this is determined randomly using the formulae listed below. "Tiles" represents the size (in tiles) of the Node's area of influence:
| Magic Setting | Budget Formula | Budget Range | |
|---|---|---|---|
| "Weak" / "0.5" | Arcanus | (Random(11) + 4) × Tiles2 × 0.5 | 62 - 750 |
| Myrror | 250 - 3,000 | ||
| "Normal" / "1.0" | Arcanus | (Random(11) + 4) × Tiles2 | 125 - 1,500 |
| Myrror | 500 - 6,000 | ||
| "Powerful" / "1.5" | Arcanus | (Random(11) + 4) × Tiles2 × 1.5 | 187 - 2,250 |
| Myrror | 750 - 9,000 | ||
| "2.0" (v1.40+ only) | Arcanus | (Random(11) + 4) × Tiles2 × 2 | 250 - 3,000 |
| Myrror | 1,000 - 12,000 | ||
| "2.5" (v1.40+ only) | Arcanus | (Random(11) + 4) × Tiles2 × 2.5 | 312 - 3,750 |
| Myrror | 1,250 - 15,000 | ||
This base budget is then adjusted for the campaign's Difficulty Setting, in +/- 25% increments (using "Hard" as the baseline), depending on the game version. The "Intro" Setting is only available in the official game, and is replaced by an "Extreme" Setting (which is in a different location on the Difficulty scale) in Insecticide and later.
| Version | Intro | Easy | Average | Hard | Extreme | Impossible |
|---|---|---|---|---|---|---|
| v1.31 | -75% | -50% | -25% | +0% | - | +25% |
| v1.40 | - | -75% | -50% | -25% | +0% | +25% |
| v1.50 | - | -50% | -25% | +0% | +25% | +50% |
At the same time, the game typically also needs to choose the magical Realm from which defenders will come, however this is a given for Nodes, as they will always match the Realm of any Node type Encounter Zone. The cost of each individual creature is listed in the following table, with changes introduced by the Unofficial Patch 1.50 (if any) highlighted under the originals (which also still apply in Insecticide):
| Realm | Possible Defenders | |||||||||||
|---|---|---|---|---|---|---|---|---|---|---|---|---|
| Unit | ||||||||||||
| Cost | 70 | 100 | 160 | 200 | 275 | 325 | 450 | 599 | 700 | 800 | 1000 | |
| 300 | 150 | 225 | 600 | |||||||||
| Unit | ||||||||||||
| Cost | 40 | 100 | 150 | 200 | 300 | 350 | 400 | 550 | 650 | 900 | ||
| Unit | ||||||||||||
| Cost | 20 | 120 | 170 | 225 | 500 | 650 | 1000 | |||||
| 50 | 325 | 200 | ||||||||||
If the encounter budget is insufficient for any creature, the Node has no defenders and the encounter is defeated the first time any unit attempts to enter the square. Otherwise, the game divides the final budget by a random integer in the range of 1 - 4 (or 1 - 6 in patches v1.50 and later), and selects the most expensive unit which costs less than this value. This will be the "primary" creature featured at the Node. If no monsters qualify, a new random number will be chosen, repeating the process up to 200 times to ensure that if the budget is high enough to afford any creatures, there will be some.
Once the primary creature type is chosen, the game divides the budget by the cost of this unit, rounding down, to determine how many of these monsters will actually be in the Node. However, this will never be more than 8 (or 6 in the v1.50+ patches), and if it is more than 1, there is a 50% chance that it will be reduced by 1. These limitations significantly increase the likelyhood of encounters featuring more than one type of monster.
The type of the primary creature(s) guarding the Node can be revealed by any scouts that move onto its square. This information will then subsequently be available through the Surveyor (F1) tool. Insecticide also vaguely denotes the amount of these creatures by adding the word "many" to the dialogue if there are 4 or more. The Unofficial Patch 1.50 takes this a step further, using "few" for 3 or 4 units, and "many" for 5 and 6 (the maximum amount in this patch) instead. Neither patch carries these quantities over into the Surveyor (F1) however, which is thus limited to showing the creature type in all game versions.
Secondary Creatures
Finally, the game calculates the remaining budget by subtracting (number of primary monster) × (cost of primary monster) from the initial budget. If this is sufficient for any creature other than the primary monster, it will then proceed to add "secondary" defenders to the Node. These units won't show up in the scouting dialogue, but if a battle is initiated at the site, their type will be displayed by the Surveyor (F1) afterwards (provided that any of them survives).
Similar to the primary guardians, secondary monsters are also chosen using a divisor roll which, just like for primary defenders, can be rerolled up to 200 times to ensure that as long as the budget is high enough for them, secondary creatures will also be present. However, the range for this random number is not pre-set, as it is for the primary guardians. Instead, the game subtracts the amount of primary monsters already added to the Node from 10 (or 9 in v1.40 and later), and uses this value as the maximum range of the random function. For example, if the Node already has 3 primary creatures, the secondary divisor will be in the range of 1 to 7 (or 1 to 6 in v1.40+).
Again, the most expensive unit (other than the primary monster), which costs less than the remaining budget divided by the random number, will be selected. The rest of the encounter is then populated with this creature, up to the maximum of 9 total units (including the primary monsters), or until the remaining budget is exhausted. That is, the amount of secondary monsters will be the lower of either (9 - amount of primary monsters), or (remaining budget) / (cost of secondary monster).
Multiple Battles
If, during an assault on a Node, the invading army manages to kill a defending unit, but then loses the battle or retreats, that unit will not be restored unless it has the ![]() Regeneration ability. This means that it is possible to "whittle down" the Node's defenders with several subsequent battles, instead of trying to kill all of them at the same time.
Regeneration ability. This means that it is possible to "whittle down" the Node's defenders with several subsequent battles, instead of trying to kill all of them at the same time.
However, any guardians that are not destroyed completely are fully healed at the end of each battle, and will have all ![]() figures restored to life appropriately. Thus, it is not possible to kill one unit by injuring it repeatedly in each battle - it must be killed completely to ensure that it does not reappear in the next battle.
figures restored to life appropriately. Thus, it is not possible to kill one unit by injuring it repeatedly in each battle - it must be killed completely to ensure that it does not reappear in the next battle.
Treasure
- Main article: Treasure
The rewards for conquering a Node depend largely on its defenders: the stronger the creatures guarding it, the better the Treasure. Supreme rewards, such as new Spellbooks, or Retorts, are only found behind the strongest monsters. The game decides the types of Treasure that will eventually be awarded immediately after setting out the monsters, meaning that conquering the Node in multiple battles will not reduce the Treasure found inside. On the other hand, because Treasure specifics are only chosen at the time of the victory, saving before the (final) battle can be useful for rerolling them.
Treasure Budget
- To determine the base value of the Treasure, the game first tallies up the guardians. The full cost of the primary monsters is converted into Treasure "points", while secondary creatures only contribute half of their cost. Thus, the formula is (cost of primary monster) × (amount of primary monster) + (cost of secondary monster) × (amount of secondary monster) / 2. In v1.50 or later, the cost of the secondaries is no longer halved, and the full creature cost is used as the base Treasure "budget" instead.
- In v1.31 and v1.40 (but not in v1.50), this base "budget" is then put through what is essentially a reverse function of the Difficulty adjustment used to scale the creature budget (see above), so that Treasure value is more or less unaffected by the Difficulty Setting (as in the original game Difficulty is only supposed to scale down monster strength). That is, unless the game is played on the "Impossible" Setting, for which the Treasure is not adjusted downward, meaning that the higher creature budgets here result in more valuable Treasure than on any other Setting.
- Finally, the budget receives a percentage adjustment. In the official game and Insecticide, this modifier is random depending on the Plane where the Node is located: on Arcanus, the final budget will be 50% - 125% of the previously obtained value, while Myrran sites will have between 76% to 175% of that. v1.50 uses flat values instead of the random percentages: Arcanian Nodes in this patch will have exactly their total monster value to spend on Treasure, while those on Myrror receive 125% of this. However, as this patch also deals with Encounter Zones that have no guardians differently than the original game, the final budget is further increased by 30 in v1.50, and by 75 in v1.51+ (note that the v1.50 value can occasionally result in no Treasure being found).
- In the official game (and also in Insecticide), if the Node contains no creatures, or if their total cost is below 50, the Node's Treasure budget will be set to exactly 50, which allows for a single Treasure roll (see below). This can yield either 10 - 50, 10 - 50, or a single spell with a default Spell Rarity of Common. Unfortunately, spells can no longer be found in empty sites starting with v1.50.
Treasure Types
- Once the budget is calculated, the computer starts rolling imaginary 15-sided dice to select the basic types of loot found in the Node's hoard. For each roll, if the remaining treasure budget is less than the "Qualify" value (or the "Cost" in v1.50+); or the maximum number of that treasure has already been created; the die is rerolled. Otherwise, the "Spend" value (or, again, the "Cost") of the Treasure is subtracted from the budget, and the selected Treasure type is added to the pile. As long as there are at least 50 points left, the die is cast again to try and add more Treasure.
v1.31 / v1.40 Treasure v1.50+ "Qualify" "Spend" Distribution Type Max Distribution "Cost" 10 (1) 200 2 in 15 Gold Coins
- 3 in 15 50 - 1000 10 (1) 200 2 in 15 Mana Crystals
- 3 in 15 40 (1) - 800 300 400 (2) - 3,000 5 in 15 Magical Item 3 3 in 15 200 (3) - 5,100 400 1,000 1 in 15 Prisoner Hero 1 1 in 15 400 3 in 15 Spell 1 (4) 4 in 15 50 50 Common Spell 150 200 200 Uncommon Spell 600 450 450 Rare Spell 1,350 800 800 Very Rare Spell 2,400 1,000 all
remaining2 in 15 Special
(Spellbook / Retort)1 (4) (5) 1 (6) in 15 800 (1) : The 50-point minimum to generate any kind of Treasure still applies. (2) : If the remaining budget is lower than 400, the amount spent can be reduced below this. (3) : Magical Items still require 300 points remaining to be added to a hoard even in v1.50. (4) : Spell and Specials are mutually exclusive. (5) : Specials may only be added once, but the amount of picks added (up to 2) depends on the remaining budget. (6) : There is a further 45% chance that this Treasure type is rerolled regardless of remaining budget.
- As noted in the table, Special Treasure can only be added once to a hoard (removing any Spell in the process). When this type comes up on the roll, if the budget is sufficient, the game checks whether it is also enough for 2 "picks". This requires 2,000 points in the original game, and respectively 1,600 in v1.50+. Should this be the case, both "picks" are added, otherwise only one. In the official game and Insecticide, adding a Special also means that all other Treasure is ultimately discarded from the pile.
- For Treasure types that have a value range, these are tied to the budget and will be determined at the same time. While this means exact amounts for Gold and Mana, for Magical Items it is a maximum value instead (which, in v1.50+ will actually be 120% of the Treasure points spent).
- In the case of Spell rewards, another random roll is made to determine a default Spell Rarity between 1 and 4 (Common through Very Rare). "Qualify" and "Spend" values are used according to this rarity. However, versions 1.31 and 1.40 will actually add up multiple "Qualifying" rolls of this type, up to the maximum spell rarity of 4 (Very Rare Spell), at which point any further Spell type results of the d15 are immediately rerolled instead. v1.50 removes this behaviour altogether, and can not overwrite an already set rarity with another. Neither version will try to award a lower default rarity if the original roll does not "Qualify".
Treasure Specifics
- Gold and/or Mana Crystal piles can appear multiple times in the Node's Treasure, and their amounts are determined at the start of the game (added together).
- The quality of a Magical Item reward is supposed to scale with remaining treasure points, but in version 1.31, the program only manages to constrain the item's quality in the case of a "Failed Special". Typically, then, the wizard only needs the Spellbook ranks that an item demands, for it to be eligible to (randomly) appear in a Node. Full lists of pre-fab items and their arbitrary rank requirements can be found here, in the article on Treasure. The articles on Magical Items and Encounter Zones also examine in detail how the items are actually chosen.
- A Prisoner, a most uncommon find, might also be held at the Node. This individual will be one of the 25 non-champion Heroes in the game, drawn at random from those who are not already in the Wizard's service or defeated. The captive V.I.P. will offer to join for no initial cost, out of gratitude for being rescued (however, their upkeep won't be free unless they bear the Noble trait). Before v1.50 however, if the victorious army stack is 9 units deep, or the Wizard already controls 6 Heroes, "Absolutely Nothing" will appear in the Prisoner's place.
- For Spell rewards, the game will first enumerate the Realms available to the Wizard based on their Spellbooks, and choose one randomly out of these. The Arcane Realm was supposed to always be valid for this for any Wizard, however a bug in the program (before v1.50) only allows these spells to be found if the player possesses either of the (completely unrelated) Alchemy or Warlord Retorts. A random spell is then chosen from the selected Realm matching the default Spell Rarity set out at game creation (see the Spell section of the Encounter Zone article for exceptions). If this spell is already known, the game will sequentially try to award all other spells of the same Realm and rarity. If that also fails, it increases the rarity (wrapping around from Very Rare to Common), and checks each spell in succession until it finds one that is not yet known. Only if all spells of the chosen Realm are known will MoM pick another color to try. There is no replacement reward for Wizards who already know all of the spells available to them based on their books.
- When a Special is generated, there is a 74% chance that it will be a Spellbook, and a 26% chance that it is a Retort. Retorts that cost 2 picks can only appear at a site with 2 Specials, and will cost both Specials. The Myrran Retort cannot appear in Treasure, and the prerequisites for all other Retorts are ignored. Spellbooks found in a Node will always be of the Node's own Realm. Because a Wizard cannot possess more than 13 Spellbooks and 6 Retorts in a single campaign, any Special reward above these will instead be replaced by a Magical Item with a maximum value of 1,200 (or 2,000 per "pick" lost in v1.50+).
Rampaging Monsters
- Main article: Rampaging Monster
Any Node that has not yet been cleared of defenders is a possible source for Rampaging Monsters.
| Difficulty | Budget | Frequency |
| Intro | Turn x 0.4 | ~1/50 turns |
| Easy | Turn x 0.4-0.8 | ~1/30 turns |
| Average | Turn x 0.4-1.2 | ~1/20 turns |
| Hard | Turn x 0.4-1.6 | ~1/14 turns |
| Impossible | Turn x 0.4-2.0 | ~1/10 turns |
Starting from turn 50, there is a chance for Rampaging Monsters to be generated from a random still-populated non![]() life Encounter Zone; although only Nodes that are on the same continent as a Town controlled by any player are valid for this procedure. Both the frequency of this event, and the strength of the monster group created, are random, with limits controlled by the game's Difficulty Setting. The frequency is also increased if the only remaining Neutral Cities are not on the same continent as any Wizard's Towns (resulting in the failure of creating Raiders).
life Encounter Zone; although only Nodes that are on the same continent as a Town controlled by any player are valid for this procedure. Both the frequency of this event, and the strength of the monster group created, are random, with limits controlled by the game's Difficulty Setting. The frequency is also increased if the only remaining Neutral Cities are not on the same continent as any Wizard's Towns (resulting in the failure of creating Raiders).
The Realm of the Rampaging Monsters will always match that of the source Encounter Zone, and the process uses a creature "budget" similar to that of generating site guardians. This budget is determined by the turn number and Difficulty and, in the original game, is halved if the Rampaging Monsters are spawned on the same continent as an AI wizard's Fortress (provided that the human player's capital is not also on that continent). The Insecticide patch increases the budgets by 25% in general, and provides a new option to further double them ("Monsters Gone Wild").
Unlike site guardians, the process used for generating Rampaging Monsters does not use divisors, and is not limited to 2 types of monsters. The game will simply select random monsters one by one from the matching Realm until it uses up the allocated budget.
Combat in a Node
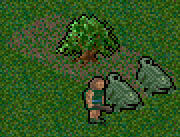
A Nature Node as it appears during combat, and a few defending creatures.
Whenever combat occurs on the tile of a Node, or even within its vicinity, special rules come into play that may have a bearing on the outcome. Generally speaking, Wizards who use spells from the same Realm as the Node will have an easier time doing battle within its area, whereas other wizards may have problems when doing so. As a result, the Node can be a strategic asset, or a dangerous area that needs to be avoided.
During battle at the Node's own tile, the Node is capable of countering any combat spells that do not belong to its Realm, while they are being cast. In addition, when combat takes place anywhere within the Node's area of influence, all Fantastic Units from the Node's Realm receive powerful bonuses to their combat attributes.
Both effects are visible when clicking the "Info" button during battle, and this is the only way of telling whether a tile falls within a zone of influence without actually melding with the Node.
Node Dispelling Aura
The massive output of magical energy from the Node can interfere with the casting of combat spells. During battles that take place on the same tile that the Node itself is located on, any attempt to cast a combat spell that is not from the Node's own Realm must face a dispelling attempt that may interrupt and counter the spell.
This dispelling attempt occurs immediately upon selecting the spell for casting - before any target can be chosen. If it is successful, the spell will fizzle with no effect, wasting both ![]() Mana and the "Spell" action of the caster. The strength of this dispel is always
Mana and the "Spell" action of the caster. The strength of this dispel is always ![]() 50, thus, the formula for calculating its success rate is as follows:
50, thus, the formula for calculating its success rate is as follows:
Dispel Chance = 50 / (50 + TSCC) * 100,
where "TSCC" is the total Casting Cost of the spell, including any reductions for Retorts or high Spellbook counts.
For example, when attempting to cast a ![]() Fire Bolt spell in a
Fire Bolt spell in a ![]() Nature Node with a total of
Nature Node with a total of ![]() 12 invested, the chance of it being dispelled will be as follows:
12 invested, the chance of it being dispelled will be as follows:
Dispel Chance = 50 / (50 + 12) * 100
= 50 / 62 * 100
= 0.80 * 100
= an 80% chance to dispel this spell as it's being cast.
Spells from the Node's own Realm will bypass this effect entirely. They will never be dispelled by the Node regardless of their type or Casting Cost. The same ![]() Nature Node from above will completely ignore an
Nature Node from above will completely ignore an ![]() Ice Bolt,
Ice Bolt, ![]() Giant Strength, or
Giant Strength, or ![]() Entangle spell for example, allowing
Entangle spell for example, allowing ![]() Nature-wielding wizards to cast with impunity in its presence.
Nature-wielding wizards to cast with impunity in its presence.
The only way to counter this effect is through the Node Mastery retort. This allows a Wizard (and any units under their control) to cast spells from any Realm inside any Node, without them being subjected to its dispelling effects. This gives Wizards with this retort a clear advantage in Node combat. It may also be worth noting that, while invoked using the "Spell" button, the ![]() Web Spell ability of
Web Spell ability of ![]() Giant Spiders, and the
Giant Spiders, and the ![]() Summon Demons ability of
Summon Demons ability of ![]() Demon Lords, are not considered actual spells, and may not be countered or interrupted as such. However, these are the only exceptions, and any other action taken through the use of the "Spell" button is subject to dispelling based on the Realm of the effect. Spells cast through the Spell Charges (Item Power) are also affected.
Demon Lords, are not considered actual spells, and may not be countered or interrupted as such. However, these are the only exceptions, and any other action taken through the use of the "Spell" button is subject to dispelling based on the Realm of the effect. Spells cast through the Spell Charges (Item Power) are also affected.
Node Unit Bonus Aura
During combat on any tile that is inside the Node's area of influence, all Fantastic Units from the Node's Realm receive a set of very important bonuses:
- +2 Melee Attack Strength
- +2 Ranged Attack Strength
- +2 Defense
- +2 Resistance
Although the bonus to Melee- and Ranged Attack Strength applies only if the unit possesses the appropriate attacks by default, the Ranged Attack bonus applies to all types of Ranged Attacks, including short range ones (![]() Thrown,
Thrown, ![]() Fire- and
Fire- and ![]() Lightning Breath,
Lightning Breath, ![]() Doom Gaze, and the hidden physical component of other Gaze Attacks).
Doom Gaze, and the hidden physical component of other Gaze Attacks).
All Fantastic Units from the Node's realm are affected, regardless of their owner, while other units are unaffected in any way. For example, a ![]() Sorcery Node will give these bonuses to any
Sorcery Node will give these bonuses to any ![]() Sorcery creature fighting within its area of influence. If two armies containing such creatures fight one another within the Node's vicinity, they both receive these bonuses. Note that units summoned into the battle do not receive the bonus on the turn that they are summoned, but will receive the bonus on the following and subsequent turns.
Sorcery creature fighting within its area of influence. If two armies containing such creatures fight one another within the Node's vicinity, they both receive these bonuses. Note that units summoned into the battle do not receive the bonus on the turn that they are summoned, but will receive the bonus on the following and subsequent turns.
These bonuses are extremely potent, and have several strategic implications. For starters, this means that the original creatures guarding a Node (which are all from the Node's own Realm by definition) are much harder to defeat than similar creatures encountered in, say, a Tower of Wizardry.
Furthermore, the fact that this effect also applies in the vicinity of the Node means that the entire area is a great place for some Wizards to mount a defense or an attack. The area around a ![]() Chaos Node, for example, confers great benefits to any army comprised mostly or entirely of
Chaos Node, for example, confers great benefits to any army comprised mostly or entirely of ![]() Chaos creatures. Similarly, assaulting an enemy army comprised of such creatures in the vicinity of a
Chaos creatures. Similarly, assaulting an enemy army comprised of such creatures in the vicinity of a ![]() Chaos Node is typically a bad idea.
Chaos Node is typically a bad idea.
Finally, this means that any Wizard with access to ![]() Nature,
Nature, ![]() Chaos or
Chaos or ![]() Sorcery magic is encouraged to build Towns within the influence zone of the corresponding Nodes, and protect it with creatures from the Node's Realm. This will make the Town much harder to conquer.
Sorcery magic is encouraged to build Towns within the influence zone of the corresponding Nodes, and protect it with creatures from the Node's Realm. This will make the Town much harder to conquer.
Controlling Nodes
The primary purpose of all Nodes is to provide ![]() Power. In order to do so, a Node must first be "tapped" by
Power. In order to do so, a Node must first be "tapped" by ![]() Melding a spirit into it. Once the Node is claimed, it will glow with magical
Melding a spirit into it. Once the Node is claimed, it will glow with magical ![]() sparkles. The color of these sparkles matches the color of the Wizard that is currently drawing power from the Node. Several tiles immediately adjacent to the Node will also glow, these indicate the Node's area of influence.
sparkles. The color of these sparkles matches the color of the Wizard that is currently drawing power from the Node. Several tiles immediately adjacent to the Node will also glow, these indicate the Node's area of influence.
A Node may change ownership any number of times during a campaign. It can lose its owner if said owner is ever defeated. A rival Wizard can also attempt to send their own spirit to try and meld with the Node, grabbing ownership of it.
Melding with a Node
As noted already, it is necessary to send either a ![]() Magic Spirit or
Magic Spirit or ![]() Guardian Spirit to
Guardian Spirit to ![]() Meld with a Node in order to tap its magical energies. Both of these spirits are Fantastic Units.
Meld with a Node in order to tap its magical energies. Both of these spirits are Fantastic Units. ![]() Magic Spirits are available to any Wizard, and are always part of all Wizards' starting repertoire in the latest versions of the game.
Magic Spirits are available to any Wizard, and are always part of all Wizards' starting repertoire in the latest versions of the game. ![]() Guardian Spirits, on the other hand, belong to the
Guardian Spirits, on the other hand, belong to the ![]() Life Realm (which means they are subject to availability for research if not chosen at the start of the game) - but, in turn, provide a unique benefit.
Life Realm (which means they are subject to availability for research if not chosen at the start of the game) - but, in turn, provide a unique benefit.
To ![]() Meld with a Node, the spirit attempting this must be on the same tile as the Node, on the same Plane. This is why it is normally necessary to clear out the defenders first, but this also means that any opposing army guarding a Node must similarly be defeated before the Node can be melded with. Once a spirit is in place (and has Movement Allowance remaining), the "Meld" command will become available while the spirit is selected among the active units.
Meld with a Node, the spirit attempting this must be on the same tile as the Node, on the same Plane. This is why it is normally necessary to clear out the defenders first, but this also means that any opposing army guarding a Node must similarly be defeated before the Node can be melded with. Once a spirit is in place (and has Movement Allowance remaining), the "Meld" command will become available while the spirit is selected among the active units.
Melding will always destroy the spirit itself (but will not affect the rest of the army if multiple units are selected). If the process is successful, the Node becomes tapped, and will begin to glow with magical ![]() sparkles of a color matching the banner of the empire that sent the spirit. Similarly, any tiles within the Node's zone of influence will also sparkle with the same color.
sparkles of a color matching the banner of the empire that sent the spirit. Similarly, any tiles within the Node's zone of influence will also sparkle with the same color.
Melding is not always successful. This is where ![]() Guardian Spirits have an important advantage: while a Node is melded with by a
Guardian Spirits have an important advantage: while a Node is melded with by a ![]() Guardian Spirit, any further attempts to meld with it will only have a 25% chance of success. An unsuccessful melding attempt causes no change in the Node's ownership - the spirit that attempted it is simply destroyed. The Surveyor (F1) can be used on a tapped Node to discern the type of spirit melded into it.
Guardian Spirit, any further attempts to meld with it will only have a 25% chance of success. An unsuccessful melding attempt causes no change in the Node's ownership - the spirit that attempted it is simply destroyed. The Surveyor (F1) can be used on a tapped Node to discern the type of spirit melded into it.
Because it is necessary to clear the Node's tile of enemy units before melding with it, most Wizards (including the AI) will endeavour to place a strong army stack on top of the Nodes they own. Any enemy who wishes to acquire this Node will need to defeat the guarding stack first. Naturally, Fantastic Creatures from that particular Node's Realm are at an advantage here, as they will always benefit from the Node's aura (see above) when fighting on its tile.
Node Power Output
The ![]() Power provided by a Node depends on three main factors: the size (in tiles) of its area of influence, the Magic Intensity setting chosen at the start of the campaign, and the Retorts of the Wizard in control of the Node. Other than these, "Conjunction" type random Events and the effect of the
Power provided by a Node depends on three main factors: the size (in tiles) of its area of influence, the Magic Intensity setting chosen at the start of the campaign, and the Retorts of the Wizard in control of the Node. Other than these, "Conjunction" type random Events and the effect of the ![]() Warp Node spell can also temporarily alter the
Warp Node spell can also temporarily alter the ![]() Power gained from a Node.
Power gained from a Node.
Area of Influence
- The size of the influence zone is determined randomly at the start of the game for every Node, and remains constant throughout each campaign. This can range between 5 - 10 tiles for Nodes on Arcanus, and 10 - 20 tiles for Nodes on Myrror; and will be indicated by the amount of sparkling squares once the Node has been melded with. Because Myrran Nodes cover twice as much area on average, their Power output is also generally double that of their Arcanian counterparts. This is also why they have much stronger initial defenders.
- The influence zone of Nodes always froms a field of adjacent tiles, starting from the tile that the Node itself occupies. To generate this field, the game first determines the amount of tiles it will contain, and then randomly select that many adjacent squares in the following order: the first tile is always the Node's tile, the next 8 are semi-random squares (with diagonals being somewhat less frequent) adjacent to the first one, while any tiles above these are chosen from the ring one tile further out from these. A Node with an area of influence spanning 9 tiles will thus always form a square of all tiles adjacent to the Node in every direction. It also follows that no influence zone can extend more than two tiles away from its parent Node.
- Influence zones may not overlap. In fact, when checking for this, the game even ignores Plane boundaries, meaning that if a tile is already part of an Arcanian Node's area of influence (which are always generated first), the corresponding square on Myrror is invalid for Myrran Nodes, and including it will cause the offending Node to be recreated from the beginning (i.e. choosing a new random location).
Magic Intensity
- For each tile that is sparkling, the Node's owner receives a certain amount of Power for as long as they retain control of the Node. With "Weak" Magic Intensity, this is 0.5; on the "Normal" setting, it's 1; while in campaigns with "Powerful" magic, Nodes yield 1.5 per tile of influence. In the Insecticide and later patches, these Settings are renamed to the arguably more descriptive "×0.5", "×1", and "×1.5", which correspond to both the Power generated per tile, and the multiplier in the Encounter Zone budget formula (see above). There are also two higher Settings introduced in v1.40: "×2", and "×2.5".
- For the low and the high settings (and "×2.5" in Insecticide), the Power generated by each Node is individually rounded down to the nearest whole number, before any other factors are considered (including the summing up of their Power output). For example, on the "Weak" Magic Intensity setting, controlling two Nodes with 7 influence tiles each will yield a total of 6 ( 3 from each Node), rather than 7 (14 times 0.5).
Retorts
- There are several Retorts available that will boost the amount of Power acquired from tapped Nodes. First and foremost, the Node Mastery Retort will double a wizard's Power income from any and all Nodes he/she controls, regardless of their types. Furthermore, the Nature Mastery, Sorcery Mastery and Chaos Mastery Retorts will double the Power income from the corresponding types of Nodes. For example, a wizard with Chaos Mastery will get twice as much Power from any Chaos Nodes.
- The effect of these Retorts is cumulative. Therefore, a Wizard possessing both Nature Mastery and Node Mastery will get 4 times as much Power from each Nature Node! This can amount to a massive boost of Power, and should typically encourage such a Wizard to gain control of as many of these Nodes as they can, as early in the game as they can.
- On the other hand, the effect of Retorts applies only after any rounding is done for Magic Intensity calculations, meaning that they will affect the rounded value rather than the initial one. For instance, the combined effect of Node- and Sorcery Mastery will only yield 12 ( 3 × 2 × 2) from a 7-tile Sorcery Node in a "Weak" magic campaign, and not the 14 that it would if rounding only happened at the end.
- Naturally, Retorts acquired as "Special" Treasure for defeating Encounters will apply their effect automatically to the output of any Nodes already controlled. Better yet, Retorts awarded as Treasure also ignore any pre-requisites, which makes it possible to gain any of these Masteries during the game regardless of the amount and colors of a Wizard's Spellbooks.
Conjunctions
- Conjunctions are the most common random Events in the game, simply because there are 6 different types of them (thats one third of the total possible Event types). Of these, 4 will have an effect on the Power gained from Nodes, while the conjunctions of Life and Death (called "Good Moon" and "Bad Moon" respectively), will ignore them completely.
- Events occur randomly if they are enabled in the game's Settings. Events with a duration (this includes all "Conjunction" type Events) last for a minimum of 5 turns, after which they have a (5% + 5% per turn after the 5th) chance of ending naturally. There is no way to "force" an Event to end, although the game can be reloaded after the 5th turn to reroll the ending chance.
- Each individual Node Realm has a corresponding "Conjunction", these are called the "Conjunction of Chaos", the "Conjunction of Nature", and the "Conjunction of Sorcery". Each one doubles the Power gained from the associated Nodes, and halves the Power gained from the other two types.
- This effect is cumulative with any bonus gained from Retorts, and is applied before those. Unfortuntely, the halving effect may also involve a rounding down, which will be reflected in the final Power output. In fact, this rounding is also separate from the one that occurs during Magic Intensity calculations (and happens after it). Using the above "Weak" magic 7-tile Sorcery Node example, the Power gained from this Node (with both Retorts) during a "Conjunction of Nature" would be only 4.
- This result is reached using the following calculations: 7 (tile count) × 0.5 (Magic Intensity) = 3.5, which is rounded down to 3; followed by 3 / 2 (for the "Conjunction") = 1.5, rounded down again to 1; and finally 1 × 2 × 2 = 4 is the effect of the two Retorts. Similarly, a Myrran Node with a zone of influence spanning 15 tiles on the "Powerful" Magic Intensity setting will yield a base 22, and this is the amount that will be doubled by the appropriate Conjunction (or Retorts), instead of the unrounded 22.5 that would result from the initial [15 × 1.5] formula.
- Finally, the last type of "Conjunction" Event is the "Mana Short", which will completely nullify any Power income for its duration. Naturally, this includes Power produced by Nodes, which will only return to normal once the Event has ended.
Warping Nodes
![]() Warp Node is an Instant Spell that may be cast on the overland map to target any Node that is already tapped by an enemy Wizard. For a base Casting Cost of
Warp Node is an Instant Spell that may be cast on the overland map to target any Node that is already tapped by an enemy Wizard. For a base Casting Cost of ![]() 75, it curses the Node to draw
75, it curses the Node to draw ![]() Power from its controller rather than producing it for them. The spell has no Upkeep Cost, it is sustained by the
Power from its controller rather than producing it for them. The spell has no Upkeep Cost, it is sustained by the ![]() Power drawn from the Node.
Power drawn from the Node.
Once ![]() Warp Node is cast, the targeted Node's tile will begin to shimmer, indicating the warping effect. Immediately, that Node's
Warp Node is cast, the targeted Node's tile will begin to shimmer, indicating the warping effect. Immediately, that Node's ![]() Power output is shut down completely, and it will now reduce its controller's Power base by
Power output is shut down completely, and it will now reduce its controller's Power base by ![]() -5 instead.
-5 instead.
![]() Warp Node can only be removed by casting
Warp Node can only be removed by casting ![]() Disenchant Area (or
Disenchant Area (or ![]() Disenchant True) on the affected Node tile. While the basic spell belongs to the
Disenchant True) on the affected Node tile. While the basic spell belongs to the ![]() Arcane Realm, and is thus available to any Wizard; it is somewhat expensive to cast, and neither spell guarantees the removal of the
Arcane Realm, and is thus available to any Wizard; it is somewhat expensive to cast, and neither spell guarantees the removal of the ![]() Warp Node effect - they require a successful dispelling roll (see their article for more information).
Warp Node effect - they require a successful dispelling roll (see their article for more information).
While a Node is warped, it cannot be Melded with by any spirit sent by any Wizard. Its current controller is "stuck" with it, unless they can successfully disenchant it.
Known Bugs
Melding with Occupied Nodes
It is possible to Meld with a Node without vanquishing its initial defenders first. In fact, there are at least two different ways to accomplish this, although the second one requires access to a specific spell.
"Blind Movement" Method
- This method has no prerequisites (i.e. is available to any player). First, position your spirit on a tile adjacent to the occupied Node with at least 0.5 remaining. Then change view to the other Plane, and, using keyboard movement, direct the unit onto the tile containing the Node. This can be done with any unit or stack of units that does not possess Planar Travel, consumes all remaining movement points, and reveals terrain as if the unit had moved into the coordinates on the alternate Plane that match the Node tile's.
Plane Shift Method
- The Plane Shift spell may be cast on a spirit that is positioned at the same coordinates as a Node on the opposite Plane. The game will not complain about this, and will relocate the spirit to the Node's tile, which will immediately enable the "Meld" command as long as the spirit has any movement left (or on the next turn otherwise).
Both bugs have only been tested in v1.31 at this time. Additional testing may be necessary for other versions.